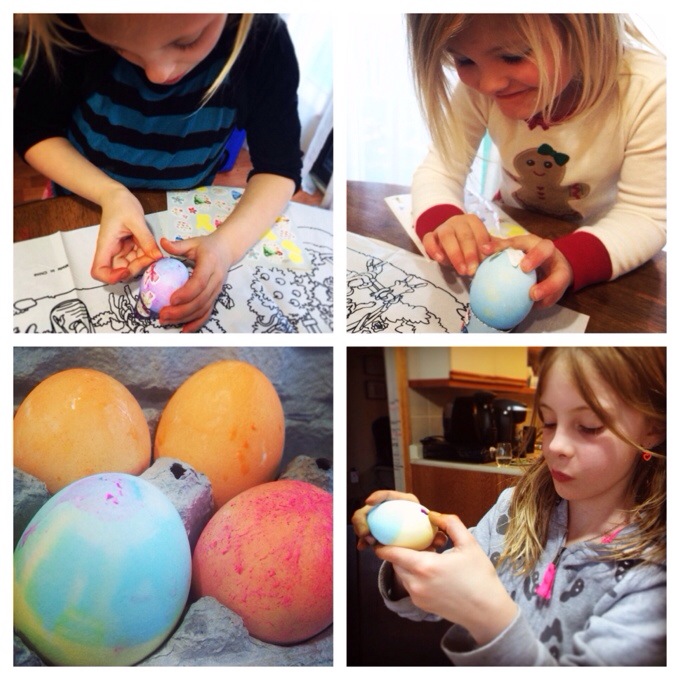
Easy Natural Egg Dye Recipe for Kids
Give the Easter bunny a run for his money by dyeing Easter eggs the natural way, using natural dyes from coffee, red cabbage and onion skins. DIY Natural Easter Eggs – It’s so easy and children have a blast seeing their food turn into fun Easter eggs!

NOTE: This post contains some links to Amazon, which means that I make a small commission off items you purchase from Amazon at no additional cost to you. I appreciate your support!
Did you know turmeric, avocado skins, red cabbage, spinach, beets and more can dye eggs for Easter naturally?

Hurray! It’s Spring! You know what that means? It’s time to celebrate the re-birth of man with EASTER! And with Easter comes Easter Egg Hunting!
Why do we hunt for Easter Eggs? Two reasons:
- The egg shape is very similar to the shape of the tomb that Christ arose from.
- Because eggs were a symbol of the re-birth of earth in Pagan celebrations.
Egg hunting is a welcome tradition in my family as we celebrate both the re-brith of earth and the re-birth of man. This is why every Easter we decorate eggs NATURALLY, then hide them.
Naturally Dyed Easter Eggs

To Dye Eggs Naturally You’ll need:
- Saucepan
- Slotted spoon
- Mason jars
- Eggs
- Water
- White vinegar
- Crayons*
- Elastic bands*
- Sponges*
*Optional
Guide to natural Easter egg dyes:

RED
- Red onion skins, use a lot (boil with eggs)
- Pomegranate juice
- Beet root
ORANGE
- Yellow onion skins (boil with eggs)
- Yellow onion skins (boil with eggs)
YELLOW
- Lemon or orange peel (boil with eggs)
- Carrot tops (boil with eggs)
- Celery seed (boil with eggs)
- Ground cumin (boil with eggs)
- Ground turmeric (boil with eggs)
YELLOW BROWN
- Dill seeds (boil with eggs)
BROWN
- Strong coffee
- Instant coffee
- Black walnut shells (boil with eggs)
Yellow Green
- Bright green apple peels (boil with eggs)
Green
- Spinach leaves (boil with eggs)
Blue
- Canned blueberries and their juice
- Red cabbage leaves (boil with eggs)
- Purple grape juice
Violet Blue
- Violet blossoms
- Red onion skins, less amount than you need to make red (boil with eggs)
Lavender
- Diluted purple grape juice
- Violet blossoms plus squeeze of lemon (boil with eggs)
Pink
- Beets, fresh or canned
- Cranberries or cranberry juice
- Raspberries
- Red grape juice
For printable ingredients and instructions, please see the recipe card at the bottom of this post.
How to dye eggs naturally:

- Use your own judgment about exactly how much of each dye stuff to use. Except for spices, place a handful (or two or three handfuls) of a dyestuff in a saucepan.
- Add tap water to come at least one inch above the dye stuff. NOTE: This will be about 1 cup of water for each handful of dyestuff.
- Bring the water just to a boil, and then reduce the heat to low. Let simmer about 15 minutes or up to an hour until you like the color obtained. Keep in mind that dyed eggs will not get as dark as the color in the pan. Remove the pan from the heat.
- Pour mixture into a liquid measuring cup. Add 2 to 3 teaspoons of white vinegar for each cup of strained dye liquid. Pour the mixture into a mason jar ensuring your eggs are completely covered.
- Use a slotted spoon to lower the eggs into the hot liquid. Leave the eggs in the water until you like the color. NOTE: Allow the egg to sit in the jar for several hours or overnight. The longer the egg soaks, the deeper the final color will be. If you plan to eat the eggs be sure to do this step in the refrigerator.
- When eggs are dyed to the color you desire, lift the eggs out with the slotted spoon. Let them dry on a rack or drainer. NOTE: An egg carton works nicely as a drying rack. Be careful to handle the eggs gently and minimally as some of the colors can easily be rubbed off before the egg has dried.
- For a textured look, dab the still wet egg with a sponge.
- Eggs colored with natural dyes have a dull finish and are not glossy. After they are dry, you can rub the eggs with cooking oil or mineral oil to give them a soft sheen.
Natural Easter Egg Decorating Tips:

- Start with hard-cooked (boiled) eggs and refrigerate until ready to use.
- The longer you soak the eggs in the dye liquids, the more intense your colors will be.
- If desired, before dyeing the eggs, draw shapes, pictures or inspiring words on them with crayons or a piece of wax. The wax won’t absorb the color so the designs will show through. Using a crayon, simply draw a design onto your eggs and then dye as you would any other Easter egg. Your crayon design will be accentuated by your choice of dye!
- Rubber bands are all you need to make tie-dyed eggs. Use a collection of different sized rubber bands. Wrap the rubber bands, one at a time, around the eggs. Make sure to leave some of the egg shell exposed so it can be dyed.
- Once the eggs are dyed to the color you like, remove them from the water and let them dry. Once dried completely, pull the rubber bands off to reveal the banded design.
Make these naturally dyed Easter eggs, then check out my poached egg air fryer recipe, keto egg bake recipe and 30 more healthy egg recipes.
☀️ CELEBRATE SUMMER with
40+ Easy SUMMER Salad Recipes
Summer is here, and do you know what that means? It’s time to lighten things up with these fresh summer salad ideas that your whole family will love!

DIY Natural Easter Eggs Recipe
Equipment You’ll Need
Ingredients
- Hardboiled Eggs
- 1 cup of water
- 3 tbs White Vinegar
Dyestuff
- RED – Red onion skins (use a lot (boil with eggs), Pomegranate juice, Beet root)
- ORANGE – Yellow onion skins (boil with eggs ,Yellow onion skins (boil with eggs))
- YELLOW – Lemon or orange peel (boil with eggs, Carrot tops (boil with eggs), Celery seed (boil with eggs) Ground cumin (boil with eggs), Ground turmeric (boil with eggs))
- YELLOW BROWN – Dill seeds (boil with eggs)
- BROWN Strong coffee Instant coffee Black walnut shells (boil with eggs)
- YELLOW GREEN – Bright green apple peels (boil with eggs, Green Spinach leaves (boil with eggs))
- BLUE – Canned blueberries and their juice (Red cabbage leaves (boil with eggs))
- PURPLE – grape juice
- VIOLET – Violet blossoms (Red onion skins, less amount than you need to make red (boil with eggs))
- LAVENDER – Diluted purple grape juice (Violet blossoms plus squeeze of lemon (boil with eggs))
- PINK – Beets (fresh or canned Cranberries or cranberry juice ,Raspberries, Red grape juice)
Instructions
- Use your own judgment about exactly how much of each dye stuff to use. Except for spices, place a handful (or two or three handfuls) of a dyestuff in a saucepan.
- Add tap water to come at least one inch above the dye stuff. NOTE: This will be about 1 cup of water for each handful of dyestuff.
- Bring the water just to a boil, and then reduce the heat to low. Let simmer about 15 minutes or up to an hour until you like the color obtained. Keep in mind that dyed eggs will not get as dark as the color in the pan. Remove the pan from the heat.
- Pour mixture into a liquid measuring cup. Add 2 to 3 teaspoons of white vinegar for each cup of strained dye liquid. Pour the mixture into a mason jar ensuring your eggs are completely covered.
- Use a slotted spoon to lower the eggs into the hot liquid. Leave the eggs in the water until you like the color. NOTE: Allow the egg to sit in the jar for several hours or overnight. The longer the egg soaks, the deeper the final color will be. If you plan to eat the eggs be sure to do this step in the refrigerator.
- When eggs are dyed to the color you desire, lift the eggs out with the slotted spoon. Let them dry on a rack or drainer. NOTE: An egg carton works nicely as a drying rack. Be careful to handle the eggs gently and minimally as some of the colors can easily be rubbed off before the egg has dried.
- For a textured look, dab the still wet egg with a sponge.
- Eggs colored with natural dyes have a dull finish and are not glossy. After they are dry, you can rub the eggs with cooking oil or mineral oil to give them a soft sheen.
To Decorate:
- For a textured look, dab the still wet egg with a sponge.
- Before dyeing the eggs, draw shapes, pictures or inspiring words on them with crayons or a piece of wax. The wax won’t absorb the color so the designs will show through. Using a crayon, simply draw a design onto your eggs and then dye as you would any other Easter egg. Your crayon design will be accentuated by your choice of dye!
- Rubber bands are all you need to make tie-dyed eggs. Use a collection of different sized rubber bands. Wrap the rubber bands, one at a time, around the eggs. Make sure to leave some of the egg shell exposed so it can be dyed.
- Once the eggs are dyed to the color you like, remove them from the water and let them dry. Once dried completely, pull the rubber bands off to reveal the banded design.
- Eggs colored with natural dyes have a dull finish and are not glossy. After they are dry, you can rub the eggs with cooking oil or mineral oil to give them a soft sheen.


